How to Clean Your Makeup Brushes
March 23 | 2022
2 Min Read
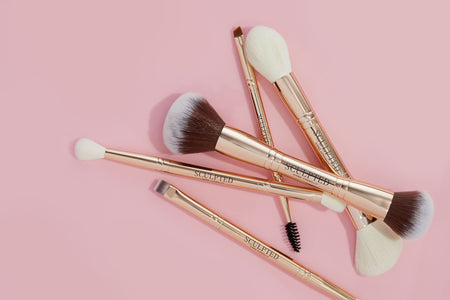
When did you last wash your makeup brushes or your foundation sponge? Last week, last month… last year? Hey, we get it. It’s that chore that slips further and further down your to-do list until, wait, when did I last clean this thing?
Making sure your brushes are squeaky clean is super important for creating a flawless base. And for making sure spot-causing bacteria aren’t lurking in the bristles! That build-up of makeup can clog the brush, making it brittle and more likely to break too, so keeping it in tip-top condition is best for the brush, your skin and your purse.

What Dirty Makeup brushes do to your Skin
Here’s a deep dive into what grubby brushes really do to your skin; the dried bits of makeup make the perfect snack for bacteria, which hang out on the bristles and multiply. When you next use the brush to sculpt your look, you’re sweeping them over your face. Gross.
And sponges? They get clogged up with oils from your makeup, which sink into the tiny holes and get stuck inside. More tasty snacks for fungi, staphylococcus, streptococcus and e-coli.
This bacteria and dirt isn’t usually harmful to your skin, but your pores aren’t a fan - hello spots and blackheads
Luckily, cleaning your brushes and sponges thoroughly spares your skin and means makeup glides on how it should. We recommend following these steps twice a week to get the most from your beauty toolkit!
1. Wash
Run some lukewarm water into a sink and dip the brush bristles into the stream, taking care not to submerge the glue that attaches them to the handle. For sponges, run under the water and give them a good squeeze.
2. Massage
Using either baby shampoo or a bar of soap, gently lather up your makeup tools, making sure you massage soap through all the bristles. If you’re washing a sponge, squeeze it whilst you rub in the soap so it soaks all the way through!
3. Rinse
Run your brushes and sponges under the tap and gently squeeze to wash out the soap. Keep rinsing until the water runs clear and your tools look clean.
4. Dry
Give your tools a final squeeze to get rid of any excess water, and lay out on a clean surface to dry naturally. If you leave the brush bristles hanging over the edge, they’ll dry quicker and more evenly. When your brushes and sponges are completely dry, put them back in a clean, dry place. Trust us - your skin will thank you!

We would love to know what your favourite makeup brushes are, let us know over on our Instagram @sculptedbyaimee and don’t forget to tag us in your #filterfreefaces pictures.
Lots of love,
Aimee & Team x
